E60 Rear Upper Control Arm Replacement DIY
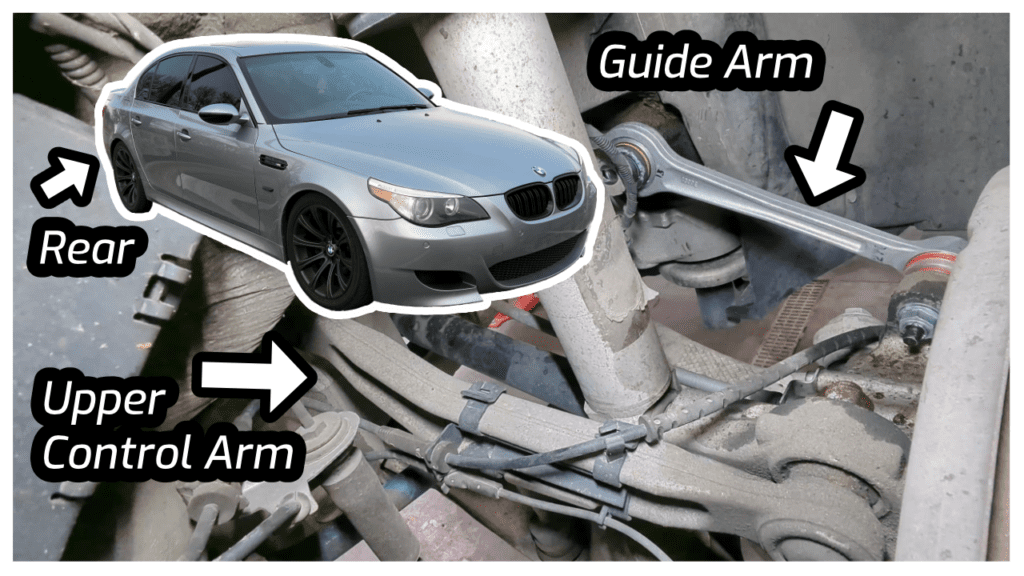
If you have been following for a while, you will know that this is the last piece of the puzzle when it comes to getting the suspension on this fantastic V10 M5 sorted. The upper rear arms had failing ball joints and needed to be replaced. In the channel update video last week I went through the difference between the 06 arms and later models (you always need to check yours).
As it turned out, the repair was not as straight forward as expected! The car has spent some time in the “salt belt”, causing some of the threads to be badly corroded. After trying several methods, I finally settled on using a big pair of vice grips to complete the job.
Video link
Steps (always check with your workshop manual to confirm the information for your year and model):
- Parts needed
- Control arms (fit a vast range of E60s but always check your particular vehicle)
- Upper control arm left 33322347991
- Upper control arm right 33322347990
- Upper control arm bolt 33306760391
- Upper control arm nut 33326760374
- M5 Specific guide arms (check your production date and also the size of the fastener)
- Guide arms left and right (upto 09/2006 but check yours!) 33322348887
- Guide arm left (from 8/25/2006) 33322283772
- Guide arm right (from 8/25/2006) 33322283771
- Eccentric bolt 33306760591
- Eccentric washer 33306760592
- Eccentric nut 33326768900
- Control arms (fit a vast range of E60s but always check your particular vehicle)
- Remove rear wheels
- OEM lug nuts are 17mm (protective socket)
- Mark the eccentric bolt
- Remove front guide arm (trick for salt belt cars)
- Install new front guide arm (loosely)
- Remove rear control arm
- Install new rear control arm
- Eye ball the alignment
- Troque specs
- Guide Arm: 65 Nm (48 ft-lbs)
- Control arm bolt inner 100 Nm (74 ft-lbs)
- Control arm bolt outer 165 Nm (122 ft-lbs)
- Reinstall the wheel
- Check/correct alignment