Frequent oil changes will make your engine last longer…. period!

Ever heard this joke? 

Q: “How long is a piece of string?” 
A: “Twice the length from the middle.” 😀 

If you ask someone (or google/search the internet) about how often you should change your car’s oil, you’ll likely get an answer as ambiguous as the joke above.

Why asking about engine oil change frequency is never a straight answer?

There are numerous factors at play:

  • The type of oil you’re using (conventional vs. synthetic).
  • The oil brand and any additives.
  • The conditions under which the engine operates (e.g., temperature, humidity, exposure to dust, sand, salt).
  • The car’s age and its past maintenance.
  • Whether the oil level has ever run low.
  • How often the oil was changed previously. …and the list goes on.

Truthfully, there’s no one-size-fits-all answer. A lot depends on your objectives and how/where you drive. Are you racing your car on a track? If so, you’ll get different advice compared to someone driving primarily for fuel economy.

So who is this for?

To narrow down the scope, let’s frame the question regarding engine oil change frequency as:

“I own a performance vehicle and aim to protect my engine while achieving maximum performance.”

While we won’t dive into which specific oil to use (that topic alone could fill libraries!), let’s assume you’re using the factory-recommended oil for your engine.

The short and simple answer to how often I should change my engine oil:

For those seeking a straightforward response: as long as you maintain the engine within standard operating conditions (oil level not reaching the ‘red’ mark and water temperature staying within the standard range), changing the oil every 3,000 miles is likely the best guidance. However, for cars that see infrequent use, changing the oil at least once a year is advisable.

OK but I want to know if that is a waste of money or not often enough?

For a more comprehensive answer without diving deep into details: adhere to the above, but also consider an oil analysis annually or every other oil change. Companies like Blackstone Labs or Wix offer such services (rokauto is a great place to pick up oil sample kits). Personally, I get an oil analysis with every change because I prefer detailed insights over time. For instance, with my BMW M5 S85 V10, I’m keen on monitoring my rod bearings!

Understanding every aspect of the oil analysis might be challenging. The brief summaries provided by these companies can offer crucial guidance regarding engine oil change frequency. In essence, an oil analysis is the most definitive way to gauge if you’re changing the oil at the right intervals for your specific oil, engine, and driving habits. In the industrial sector, routine oil analyses are standard practice due to their importance.

What else can an oil analysis tell me?

Beyond just checking oil health, oil analysis can also detect other engine issues. In the past, such tests have identified a failed head gasket for me (evidenced by coolant in the oil), fueling issues (like running too rich or having faulty rings – fuel detected in the oil), and many more. Additionally, these tests can provide feedback on the oil you’re using, potentially offering insights into whether it’s offering adequate protection for your engine.
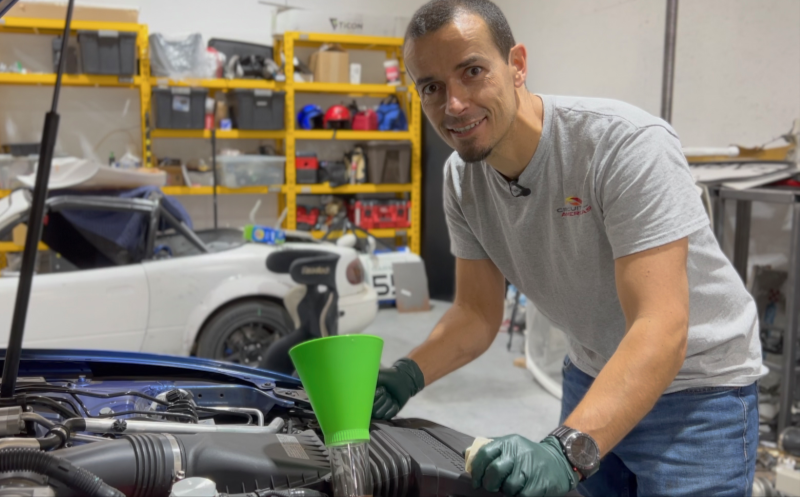
E60 Differential Oil Change is Easy!

Based on the color of the oil and the content of the Blackstone report, this change was way past due. The differential had no leaks, and thankfully, wasn’t making any noise. This is one thing that you need to check when buying an M5, as a replacement can be costly. 

The only thing you have to be careful about is using the right torque for the plugs. There are two different types: one with a washer and one with an o-ring. It’s only a 5NM difference, so it’s not the end of the world. 

The oil change kit came from FCP Euro, and interestingly, it had a Mercedes sticker on the bottle. I guess if it’s good stuff, it’s good stuff 🙂

Don’t delay, change the oil on your BMW E60 M5 V10 Differential today!

FCP kit link. Part number from FCP is: 33117525064KT6 – Contains 3x500ml bottles of 75W140 Castrol Syntax LSD Oil and two differential plugs (OEM part number 33117525064). OEM differential oil is 3-4x the price. The OEM part number for the oil if you’re interested is 83222282583.

You will need a 14mm hex socket and a torque wrench capable of 65NM. Gearwrench have a socket that is widely available and has the part number 80662. Amazon of course has a bunch available that are cheaper. There are some lower profile ones which might work better with the exhaust. 

Video link 

E60 Charcoal filter/vapor canister DIY

This part is often overlooked but can cause issues on the E60 platform. The replacement itself is very straightforward and can be done with simple tools that you likely already have!

The filter itself is located in the rear right wheel well behind the plastic liner. The liner is easily removed, and the filter is held in place by a couple of 10mm bolts. You have to be somewhat careful with the attached plastic pipes.

One key giveaway that indicates you need to replace this filter is if you ever hear air rushing into the gas/petrol tank when you undo the cap.

Hopefully, this video is useful to you 🙂

Video link 

Step By Step

Step 0: Optionally loosen the rear right wheel

If you don’t have access to an electric or air impact driver capable of removing the torqued lug bolts, now is the time to loosen the wheel lug bolts with hand tools. The best method is to loosen each bolt one at the time. Once the clamping force has been released, hand tighten the bolt again before moving onto the next bolt. 

Step 1: Jack up the rear right of the car

The M5 has plastic jacking points. Use the included jack, or a floor trolley jack to raise the rear right wheel off the ground. When working on raised cars, for safety always support the car on a jack stand.

Step 2: Remove the rear right wheel

In order to remove the plastic wheel arch liner, the wheel must be removed. With the wheel clear of the floor, finish removing each bolt being careful with the last bolt (as the wheel may suddenly drop).

If there is any corrosion between the wheel and the rotor/hub you may have to use some gentle persuasion to remove the wheel. I am always paranoid about knocking a vehicle off of jack stands and in this video I discovered a cool trick to removing a particularly stubborn wheel link.

Step 3: Remove the plastic wheel liner

Remove the 8mm bolts found at various places in the wheel liner. Make sure you keep track of where each bolt came from as some are machine screws that need to go back in the same place. As well as the 8mm bolts, there are two plastic 10mm nuts.

Finally, there are three additional 8mm bolts under the vehicle infant of the plastic wheel deflector, as well as a single plastic plug at the rear of the wheel liner about half way up.

With all of the bolts removed carefully peel the plastic wheel liner out of the wheel well. 

Step 4: Disconnect the plastic pipes attached to the charcoal filter

With the plastic wheel liner out of the way, you will now have access to the charcoal filter. There are a number of plastic pipes which need to be removed before we can remove and replace the filter. Depending on the age of the vehicle, these pipes might be very brittle. Carefully squeeze the release clamp at the end of each pipe and gently wiggle the pipe free.

Step 5: Disconnect the electrical connector 

With the plastic pipes removed, the electrical connector can now be removed from the charcoal filter. Pressing the release mechanism, the connector can be pulled from the socket. If it is particularly stubborn you can assist the removal with a small flat bladed screw driver. Go slowly and carefully to ensure nothing is damaged.

Step 6: Unbolt and remove the charcoal filter

There are two 10mm bolts holding the charcoal filter in place. Remove these but keep one hand on the charcoal filter when removing the second bolt (otherwise it may slip and fall). With the last bolt removed, lower and rotate the filter out of the rubberized hooks at the top.

Step 7: Swap over the pump

The new filter does not come with the pump. Unscrew the three Torx bolts holding the old pump from the old filter. With these removed, gently pull the pump from the filter (you may need to use a small twisting motion to release the pump). Clean up the pump and transfer it to the new filter. Replace the three Torx screws ensuring you don’t cut new threads. If the screw immediately starts to become hard to screw in, back out the screw until you feel it click and it should find the original threads. 

Step 8: Install the new pump in the car

The new pump can be reinstalled in the car. Taking the pump and one of the 10mm retaining bolts, slide the rubberized mounts into their sockets and hand tighten one of the 10mm bolts. Install the remaining bolt. 

You can now reconnect the electrical connector and all of the plastic pipes. In each case an audible click will be heard when they are seated correctly. Depending on the environment the car has been driven in, you may need to clean up the pipes and electrical connectors before reconnecting. 

Take a moment to check over the installation to ensure nothing has been missed.

Step 9: Install the wheel well liner

With the new charcoal filter safely in its new home, the wheel well liner can be reinstalled. 

Take your time to seat the liner and ensure the holes are over the studs for the plastic 10mm nuts and the face that meets the painted lip of the wheel arch is seated nicely in place. Reinstall the plastic plug removed in step 3. This holds the wheel liner in place whilst you reinstall all of the bolts and nuts (again being careful to ensure the correct type of bolt goes back in the correct location).

Step 10: Install the wheel

Now is a great time to clean up both the rotor/disk face as well as the mating wheel surface. This can be done using sand paper or I prefer to use a 3M Scotch-Brite Roloc Surface Conditioning disks on the end of a drill. The goal here is to remove any surface corrosion without cutting into the underlying metal so take your time.

With the surfaces cleaned up, reinstall the wheel and the lug bolts. It is good practice to hand tighten each bolt in a criss cross pattern to ensure the wheel is seated correctly. With the bolts hand tight, raise the vehicle again to remove the jack stand and then slowly lower the vehicle until the wheel just touches the ground. The idea is to have enough weight loaded onto the wheel to stop it rotating but not to throw it off center (we are also trying to not use the transmission or parking brake to help with the wheel torquing). Torque to the wheel bolts in a criss-cross pattern to the correct torque.

The vehicle can now be fully lowered.

Step 11: Test

With the new filter in place, start the vehicle and check to make sure there are no new lights or stored engine codes. This is just a sanity check that all of the pipes and wiring are reinstalled correctly. The lights and codes may not appear immediately but none should cause drivability issues. 

Enjoy!